Images and alt text

In this post, I will look at adding alt text when uploading images, as well as adding them after they have already been embedded.

Alt text can be added to images in the following ways:

  1. Added during the initial upload process (best!)
  2. Added directly to a post after the upload
  3. Added to the media library after upload
    This change will NOT apply alt text to any posts/pages that already include the image. It will only be applied to future uses of the image.

Alt text not added upon upload

The following two images illustrate what happens if you change or add alt text in the Media Library, after the image has already been added to a post/page.

  1. To start, no alt text was added at the time of upload. The image was added to the post without any alt text to start. I later updated the alt text in the Media library to show “First Mate Piggy”.
  2. The first image includes alt text that I manually added to the instance of the image in this post, after the upload process had already been completed, “Alt text added after”.
  3. The second image includes the alt text that had been added in the Media library (“First Mate Piggy”) – all subsequent additions of this image will have this as the default alt text.
Alt text added after
First Mate Piggy

Youtube unavailable – can’t embed

Most of the time, if you get a message that a Youtube video can’t be embedded, it’s because the content creator did not enable embedding when they released the video on Youtube. By default, this option is not checked.

Using the Youtube block + URL

In the Youtube block, you see this message if the video is not set to allow embeds.

Using the Custom HTML block + embed code

This process appears to start out alright – but if you try to play the video, you get the message that the video is unavailable.

In the Custom HTML block, you see this message if the video is not set to allow embeds.
https://www.youtube.com/watch?v=Sh4s20aYD1k

Youtube video

We try a few different ways of embedding Youtube videos, with varying degrees of success.

Youtube is one of the most common media types that the students embed into their blogs (although, as we get more embeddable things, this may change).

Here are a few tests.

Youtube link

I just wanted to include the link to the video I’m using, and the only way I could do it was to use a preformatted block! LOL.

https://www.youtube.com/watch?v=-17TliuArs8

Youtube URL embed (Youtube block)

This is actually really easy to use, because you don’t even have to select the Youtube embed block – or any block, for that matter. Just hit enter, to start a new block, and paste in the URL of the Youtube video. When you hit enter, WordPress will know that it is a Youtube URL and create a Youtube embed block out of it. Neat!

Note that some Youtube creators do not permit embedding on an external website – this is their choice, and not a problem with WordPress

I posted this as Super Admin. I can use the fullscreen option.
I added this as a blog admin.

Youtube embed code (using Custom HTML block)

This may or may not work for blog admins. Since this is inconsistent, I don’t recommend using this method for Youtube – especially when there is a better available option (above).

As a super admin, I can post the embed code and it will work – but blog admins, authors, etc. will have their code stripped by WordPress, for security purposes.

Here is the original embed code copied from Youtube:

<iframe width="560" height="315" src="https://www.youtube.com/embed/-17TliuArs8" frameborder="0" allow="accelerometer; autoplay; clipboard-write; encrypted-media; gyroscope; picture-in-picture" allowfullscreen>

I first added it using a “Super Admin” account, and it worked fine (with fullscreen options)

Next, I tried using a “Blog Administrator” account. Not only was the code stripped for the new video (below) BUT it stripped the code of the above video. Both play, but the fullscreen option does not work.

This is what the stripped code looks like:

<iframe width="560" height="315" src="https://www.youtube.com/embed/-17TliuArs8" frameborder="0">

Embed Google content

Leverage Ryerson’s GSuite tools for media objects in your blog. Let’s see what works!

GSuite (Google for Education) offers a collection of tools that are great for creating and collaborating on content. Some of this work can even be embedded in a WordPress post or page! These tools are available to the Ryerson community via your my.ryerson login – so no separate account is required!

A quick note:

Google content can be divided into two categories: content created using a Google tool (a Google Doc, Google Slides, Google Drawing, Google Sheets) and third-party files uploaded to Google and viewed through a preview (audio and video files, Word documents, PDFs).

The embed methods are different for these two things. For now, I am focusing on the native Google tools. For the most part, this involves opening the Google content and, in the menu, going to File > “Publish to the web” and copying the embed code, which can be pasted into a “Custom HTML” WordPress block.

The following demos were completing by a user with an “Author” role in the blog, as a way to confirm that the embed code will still work mostly as expected by any content creator. The ability to display in full-screen is stripped out of the code. (Embed code from other applications is sometimes stripped for security reasons – this did not happen with the Google embed codes below).

On this page:

Google slides presentations

Google Slides is like a stripped-down version of Powerpoint, and can be a great way to add content with a sequence, integrating images and text.

This is the sample Google Drawing used in this demo – it has been shared with the public, so it can be embedded here: https://docs.google.com/presentation/d/1-d8c3TJ34EyBDkSDuumUX8M8jofDZLdsJTuNbfsd3Xk/edit?usp=sharing

When editing your Google Slides, go to File (in the menu) > Publish to the web & get the embed code. I used the small size, 640 x 389, which fits the blog post size well.

Here is the code I got from Google:

<iframe src="https://docs.google.com/presentation/d/e/2PACX-1vSuYz6WBYJ2Zg7VzQBXtjOpqsDhKkPUaXVn2gyUq62uhjOVyf5YoYS0mA_uOzV_Wnr4oo6LxH64aNUg/embed?<iframe src="https://docs.google.com/presentation/d/e/2PACX-1vSuYz6WBYJ2Zg7VzQBXtjOpqsDhKkPUaXVn2gyUq62uhjOVyf5YoYS0mA_uOzV_Wnr4oo6LxH64aNUg/embed?start=false&loop=false&delayms=3000" frameborder="0" width="640" height="389" allowfullscreen="true" mozallowfullscreen="true" webkitallowfullscreen="true"></iframe>

This code was then pasted into a Custom HTML block, below:

Note: I tested this both as a blog admin and an author (the usual role for students), and the embed code was not stripped by WordPress.

Google Drawings

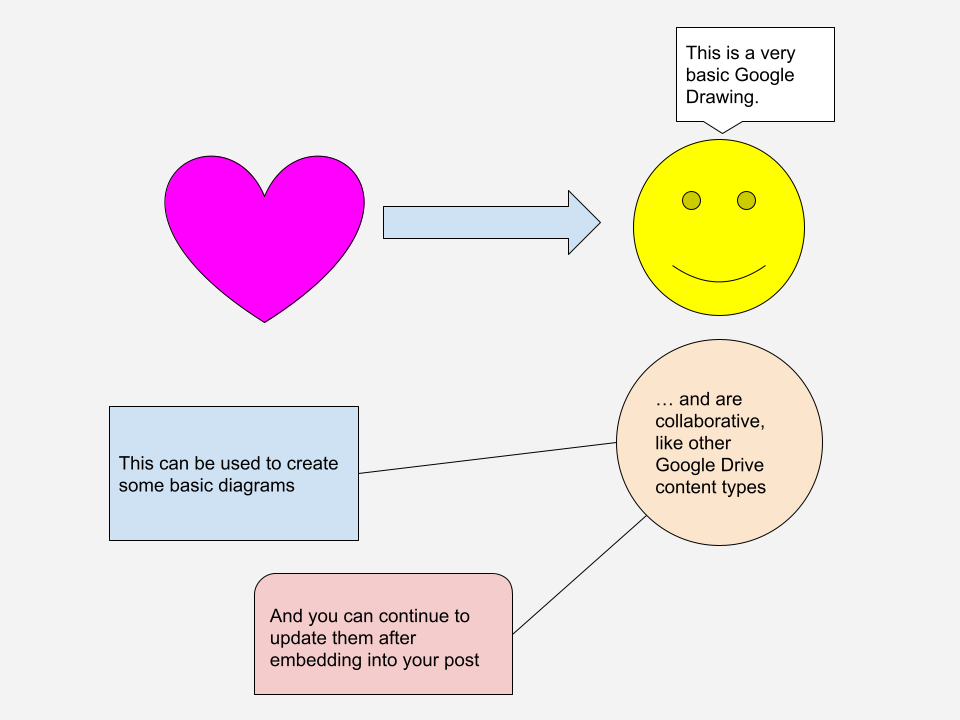
Google Drawings allows you to create basic visuals, using simple shapes, text, and colour.

This is the sample Google Drawing used in this demo – it has been shared with the public, so it can be embedded here: https://docs.google.com/drawings/d/1SUdJwNb15PPhpxIhFPQ75xa7PMVvnw0Qr6V8WKMCRd0/edit?usp=sharing

When editing your Google Drawing, go to File (in the menu) > Publish to the web & get the embed code.

Settings: I selected the medium size, 960×720, which fits the blog post size a bit better than the small version (the text was harder to read).

Just be careful not to make a drawing that is too big to fit in your post. Test it out, to make sure the text is easy to read after being embedded.

Here is the code I got from Google:

<img src="https://docs.google.com/drawings/d/e/2PACX-1vQDXRZgF2lzTC8aPYrlU8rYqpD4Mz1qWq--7H40AAMfC9tttk0RZZPJ2-p2XWSPBLXbMwz0xlDpECM7/pub?w=960&amp;h=720">

This code was then pasted into a Custom HTML block, below:

Note: This was tested using an author role.

Google Docs

Google Docs is an online, collaborative document creation tool. Apart from adding and organizing text, you can also add images, charts, symbols, etc.

This is the sample doc being demonstrated below, and it has been shared with the public: https://docs.google.com/document/d/1KaUxw6sxtxisRjMytHtq9bHEn-30Qc1MyjN6nVCPR4Q/edit

When editing your Google Doc, go to File (in the menu) > Publish to the web & get the embed code.

As you can see from the sample below, this doesn’t quite work out-of-the box. Adding some simple sizing instructions can make the embed work better – with or without a scrollbar (it will take some trial and error to find the right values).

Here is the embed code I got from Google:

<iframe src="https://docs.google.com/document/d/e/2PACX-1vQpBF5Z9a02DALDxXD652VicZ2hOz_Rw7KHf30rF_20ITFCmpLVPSNxAHunuHDtWBqfPFBl6kGf622H/pub?embedded=true"></iframe>

Test below created by a blog author.

Here is a version where I added width & height values to the iframe code, as well as a frame border so you can see the edges of the doc. A width of 100% will take up the width available in the post. You’ll need to do some trial and error with the height value, and find a value large enough to display your post without too much extra whitespace. I’ve made it just long enough to show most of the doc, with a scrollbar.

All of my additions are in bold:

<iframe src="https://docs.google.com/document/d/e/2PACX-1vQpBF5Z9a02DALDxXD652VicZ2hOz_Rw7KHf30rF_20ITFCmpLVPSNxAHunuHDtWBqfPFBl6kGf622H/pub?embedded=true" frameborder="1" width="100%" height="1500"></iframe>

What can’t be embedded?

After some testing, I couldn’t find a way to embed the following native Google content types…

  • Jamboard / Jam
  • Google Sites

Create an image gallery

Comparing the gallery block that comes with WordPress and the NextGen gallery plugin options.

Native WordPress gallery block

The native gallery block doesn’t give you a lightbox navigation option, like you see with NextGen below.

NextGen gallery block (basic)

This is just a comparison of the basic gallery in NextGen with the native gallery. For more info on NextGen options, see this page: https://reference01.blog.ryerson.ca/2019/08/19/nextgen-gallery-plugin/

Native video in WordPress

This post will explore the ability to embed video files that are stored directly in your WordPress blog.

Note: we don’t actually recommend uploading video directly to WordPress, as it takes up precious space. Instead, please consider uploading to an external site like Google Drive or Youtube and simply embed in your blog. There are posts elsewhere on this blog demonstrating these options.

MP4 video, using Video block

MOV video, using Video block

MOV files can be useful for podcasting. I don’t think you can podcast using MP4 files.

Instagram embedding

We investigate whether you can embed Instagram posts and feeds in WordPress.

Instagram feed

Without an additional plugin, I cannot find a way to embed an Instagram feed on my site. There are third-party services that will generate RSS feeds and/or embed code that you can use on your site, but we cannot confirm the security of using such services.

To be continued…

Instagram content (using the Instagram block)

There is an instagram block that is useful for embedding content. It cannot be used to embed your entire feed (like https://www.instagram.com/blepharisma/). You need to copy the link from a specific piece of content and paste into the widget (like https://www.instagram.com/p/B4syhvDHdDC/?utm_source=ig_web_copy_link)

  1. Click on the Instagram content you want to embed, so it pops up in its own window.
  2. Click the ‘…’ symbol in the top-right corner of the content.
  3. Click the ‘Copy Link’ option. This will save the URL for the content in your clipboard.
  4. In your WordPress post/page, add an Instagram block and paste the URL copied from Instagram. Click ‘Embed’ to complete.

Instagram block

Audio embed using blocks

Audio block

Using an uploaded audio file

Soundcloud block

Google Audio

Important settings on the Google audio file

  • Open sharing up (either public, or shared with the class specifically and let them know to check their Google session before accessing the blog)
  • Ensure downloding is enabled – if it is disabled, the playback will not work.

Audio block – using a Google URL?

Shared to anyone with the link. Does this even work?

This only worked with a special version of the URL from Google AND only when I’m logged into my Ryerson Google account. Not sure how to get this to work widely.

https://drive.google.com/u/1/uc?export=download&id=0B9LKEddT6B_1V3RNcnh0SXZkUDg
Where the id= includes the ID code from the file uploaded.

Below, I’m trying the version of the URL without the /u/1 (which references our domain somehow). It doesn’t work when I preview it – but does it work publicly? (no)

Embed code from Google

Just the link…

Here is just the sharing link from Google:

https://drive.google.com/file/d/0B9LKEddT6B_1V3RNcnh0SXZkUDg/view?usp=sharing

Ryecast embed

Trying different options for embedding a Ryecast video.

Admin note: Ryecast embeds will not work by default in WordPress and requires the Additional Tags plugin to be enabled. Without it, blog admins will have their embed code stripped (it works for network admin, though).

Using the Custom HTML block

Best results: Copy the default embed code from Ryecast with the size as 1152 x 648. Do your own width and height calculation based on the default values, i.e. half size 576 x 324. Don’t use the ones listed in the settings in Ryecast.

Below, I am demonstrating each of the default sizes from Ryecast.

HALF the default size 576 x 324 (best option in this WP theme)

Small – 640 x 360

Medium – should be 800×450 but it defaults to 1152 x 648. Weird. Ask Arianne about that.

Large – 960 x 540

50% size (yikes)

Using the Classic editor block

This is pretty much like using the Custom HTML block.

HALF the default size 576 x 324 (Not bad)

Using the embed block

This clearly doesn’t work.